
A delicious Mexican brunch has a special power to bring people together. For us, it’s all about Roscoe’s Chilaquiles recipe. This dish is a perfect mix of flavors and textures. The secret to this recipe is making the perfect crispy tortillas.
Chilaquiles comes from authentic Mexican cuisine. It’s a favorite breakfast or brunch made from fried tortilla chips. These chips are smothered in a rich, spicy sauce and topped with various ingredients. Our version of Roscoe’s Chilaquiles recipe stays true to its roots but adds a few tweaks to make it even better.
We invite you to try this recipe and share your creation with the todorecipes community and your friends! Don’t forget to leave your thoughts in the comments below. We value your feedback and tips.
Key Takeaways
- Learn the secret to making perfect crispy tortillas for Roscoe’s Chilaquiles.
- Discover the traditional ingredients used in authentic Mexican Chilaquiles.
- Understand the importance of using high-quality ingredients for the best flavor.
- Get tips on customizing the recipe to suit your taste preferences.
- Explore the cultural significance of Chilaquiles in Mexican cuisine.
What Makes Roscoe’s Chilaquiles: Crispy Mexican Brunch So Special

Roscoe’s Chilaquiles is special because of its crispy tortillas and rich flavors. It stands out in Mexican breakfast dishes.
This dish is more than food; it’s an experience. It combines the warmth of Mexican cuisine with the comfort of a homemade breakfast. A great chilaquiles dish balances crunch, tanginess, and richness perfectly.
The Essence of a Perfect Chilaquiles Dish
A perfect chilaquiles dish starts with crispy tortilla chips. These chips are the base for all the flavors. They must be fried until golden, adding a nice texture.
“The secret to great chilaquiles lies in the tortillas. They must be crispy, but not too hard, and full of flavor.”
The quality of the tortillas and how they’re fried are key. The tortillas should be cut evenly for even cooking. The frying oil must be at the right temperature to avoid greasiness or burning.
Roscoe’s Signature Approach to Chilaquiles
Roscoe’s elevates the traditional chilaquiles recipe with its own twist. They use a special spice blend and a unique frying method. This enhances the tortillas’ flavor and crispiness.
| Key Element | Description | Impact on Flavor |
|---|---|---|
| Crispy Tortillas | Fried to perfection | Texture and Crunch |
| Special Salsa Blend | Unique mix of spices and herbs | Rich, Complex Flavor |
| Fresh Toppings | Variety of cheeses, cremas, and herbs | Adds Depth and Freshness |
We’d love for you to try this recipe and share your culinary creation with the todorecipes community and your friends!
Essential Ingredients for Authentic Chilaquiles

Making authentic chilaquiles begins with picking the right ingredients. This step is key to this beloved Mexican brunch dish. The quality of these ingredients greatly affects the taste and texture of the dish.
Selecting the Right Tortillas
The base of great chilaquiles is the tortillas used. The type of tortilla greatly influences the dish’s flavor and texture.
Corn vs. Flour Tortilla Debate
The choice between corn or flour tortillas for chilaquiles is a long-standing debate. Corn tortillas are traditional and bring a more authentic taste. On the other hand, flour tortillas offer a different texture. For a true Mexican taste, corn tortillas are the better choice.
Fresh Ingredients for the Perfect Salsa
A fresh, homemade salsa is key to enhancing chilaquiles’ flavor. Using ripe, high-quality ingredients like tomatoes, onions, jalapeños, cilantro, and lime juice makes a big difference.
For a homemade salsa, roasting your ingredients can bring out deeper flavors. This adds complexity and depth to your salsa, making it a highlight of your chilaquiles.
Complementary Toppings and Garnishes
Toppings and garnishes can turn chilaquiles into a vibrant, flavorful meal. Adding crema, queso fresco, diced onions, or a fried egg can enhance the dish.
To add a personal touch, try different complementary toppings like avocado, sour cream, or pickled jalapeños. These add texture and flavor contrast.
Tip #1: Select and Prepare Your Tortillas Like a Pro
Crispy, crunchy chilaquiles begin with a key step: picking and preparing the right tortillas. The quality of your tortillas greatly affects the dish’s texture and taste.
Choosing the Best Tortillas for Chilaquiles
Choosing the right tortilla is vital for the best chilaquiles. Go for corn tortillas for a crunchier texture and a more authentic taste than flour tortillas. For an even crisper bite, use day-old tortillas. They are drier and soak up less oil when fried.
The Aging Technique for Maximum Crispiness
Aging your tortillas boosts their crispiness. Letting them dry a bit reduces their moisture, leading to a crunchier texture. This trick is great for making homemade tortilla chips.
How Long to Age Different Types of Tortillas
The aging time depends on the tortilla’s type and thickness. Here’s a quick guide:
- Thin corn tortillas: 24 to 48 hours
- Thick corn tortillas: 48 to 72 hours
- Store-bought tortilla chips: Not necessary, but can be toasted for extra crispiness
Aging tortillas is simple but requires patience. It greatly improves their texture and taste.
By choosing and aging your tortillas carefully, you create a delicious chilaquiles recipe. This focus on detail makes Roscoe’s Chilaquiles a highlight in Mexican cuisine.
Tip #2: Cut Your Tortillas for Even Cooking
The way you cut your tortillas is key to chilaquiles’ texture. Cutting them into the right shapes and sizes is crucial. This ensures they get crispy, making chilaquiles a popular brunch dish.
Optimal Shapes and Sizes for Crispy Results
For a delicious brunch option like chilaquiles, cut tortillas into uniform pieces. Triangles or strips work well. The goal is to keep all pieces the same size so they crisp up evenly.
Cutting Techniques That Prevent Sogginess
To avoid sogginess, cut tortillas when they’re fresh and pliable. The right cutting techniques help too. They reduce torn or crushed pieces, which tend to get soggy.
Tools That Make Cutting Easier
The right tools make cutting tortillas easier. A sharp knife or tortilla cutter ensures clean cuts. This reduces waste and makes your tortilla pieces uniform. Uniformity is crucial for crispy results that add a Mexican flair to your breakfast or brunch.
By focusing on how you cut your tortillas and using the right tools, you can greatly enhance your chilaquiles. This makes it a standout dish on any breakfast menu.
Tip #3: Master the Frying Process for Perfect Crispiness
Getting the perfect crispiness in chilaquiles depends on mastering the frying process. The right frying technique can turn simple tortillas into a deliciously crispy base or a soggy mess.
To start, you need to know about two key parts of frying: choosing the right oil and temperature, and batch frying for consistent results.
Choosing the Right Oil and Temperature
The type of oil you use can greatly affect the flavor and texture of your chilaquiles. Oils with a high smoke point, like peanut or avocado oil, are best. They can handle high temperatures without burning or smoking.
Temperature control is also crucial. If the oil is too hot, the tortillas will burn before crisping up. If it’s too cold, they’ll soak up too much oil and get greasy.
Oil Temperature Indicators
To check if the oil is at the right temperature, use a thermometer or look for visual signs. Here are some indicators to watch for:
- A thermometer reading between 350°F to 375°F (175°C to 190°C).
- A faint shimmer or slight movement in the oil when it’s heated.
- A few drops of water sizzling and evaporating quickly when dropped into the oil.
Batch Frying for Consistent Crispiness
Frying tortilla chips in batches is key for consistent crispiness. Overcrowding the pan can lower the oil temperature, making chips greasy or undercooked.
To fry in batches effectively, follow these steps:
- Heat the oil to the desired temperature.
- Fry a small batch of tortilla chips until they are golden and crispy.
- Remove the fried chips with a slotted spoon and drain on paper towels.
- Repeat the process with the remaining tortilla chips.
By mastering the frying process, you can make perfectly crispy tortilla chips. These will take your chilaquiles to the next level. Remember, practice makes perfect, so don’t get discouraged if it takes a few tries to get it right.
Tip #4: Try Healthier Cooking Methods Without Sacrificing Crunch
Looking for the perfect chilaquiles doesn’t mean you have to deep-fry tortillas. There are healthier ways to get that crunchy texture. At Roscoe’s, we focus on delicious meals that are also good for you. Let’s explore some new cooking methods to enjoy your favorite chilaquiles without feeling guilty.
Oven-Baking Techniques for Crispy Tortillas
Oven-baking is a great alternative to deep-frying. It lets you get that crispiness without using a lot of oil. Start by preheating your oven to 400°F (200°C). Cut your tortillas into shapes and sizes you like, then mix them with a bit of oil and seasonings.
Spread the tortilla pieces on a baking sheet in a single layer. This helps them cook evenly. Bake for 10-15 minutes, or until they’re crispy, flipping them halfway.
Chef Bobby Flay once said, “The key to great cooking is not just about following a recipe, it’s about understanding the techniques and ingredients.” Learning oven-baking is about getting the best flavors and textures from your ingredients.
Air Fryer Methods for Oil-Free Crispiness
The air fryer is another kitchen game-changer. It makes tortillas crispy like deep-frying but uses much less oil. To make chilaquiles in an air fryer, put the tortilla pieces in the basket. Set the temperature to 375°F (190°C) and cook for 5-7 minutes, shaking halfway.
Using an air fryer has many benefits. It uses less oil, makes cleanup easier, and lets you cook many dishes, not just chilaquiles. As you try different seasonings and ingredients, you’ll see the air fryer opens up new possibilities for healthy brunches.
By using these healthier cooking methods, you can enjoy Roscoe’s chilaquiles while keeping your meals balanced. Whether you’re health-conscious or just want to try something new, oven-baking and air frying are great for making tasty, savory chilaquiles.
Tip #5: Create the Perfect Salsa for Your Chilaquiles
A great Chilaquiles recipe starts with a great salsa. We’ll guide you through making one. The salsa is key, adding flavor and moisture to make the tortillas sublime.
Choosing between red and green salsa is a big decision. Each has its own flavor. We’ll explore the differences and how to balance flavors for the perfect Chilaquiles accompaniment.
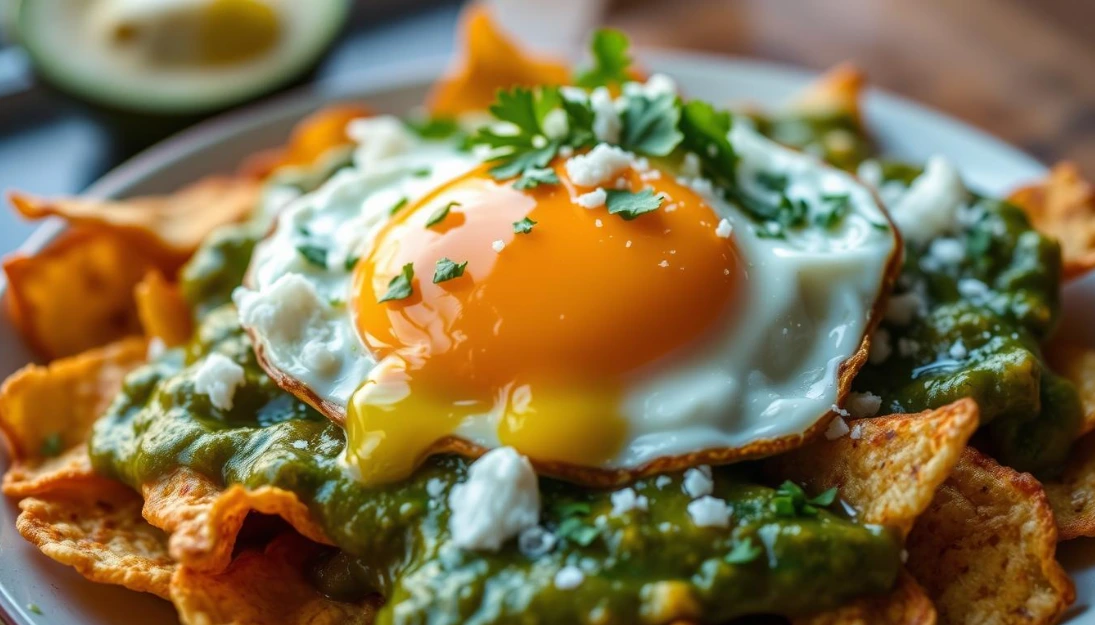
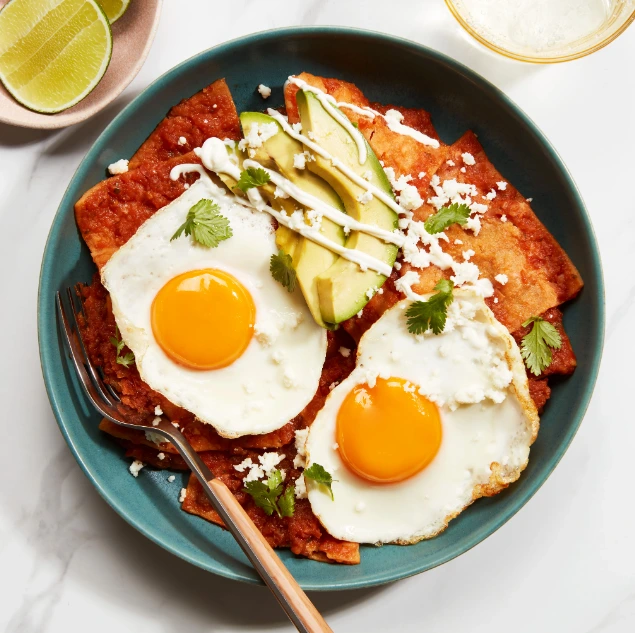
Red Salsa vs. Green Salsa: Flavor Profiles
The debate between red and green salsa is ongoing. Red salsa, or “salsa roja,” has tomatoes, onions, garlic, and chipotle peppers. It’s smoky and slightly sweet. Green salsa, or “salsa verde,” has tomatillos, jalapeños, garlic, and cilantro. It’s tangy and fresh.
| Salsa Type | Main Ingredients | Flavor Profile |
|---|---|---|
| Red Salsa | Tomatoes, Onions, Garlic, Chipotle Peppers | Smoky, Slightly Sweet |
| Green Salsa | Tomatillos, Jalapeños, Garlic, Cilantro | Tangy, Fresh |
Balancing Heat, Acidity, and Depth of Flavor
Making the perfect salsa means balancing heat, acidity, and flavor. Heat comes from peppers, like chipotles in red salsa or jalapeños in green. Tomatoes or tomatillos add acidity. Aromatics like garlic and onions, along with spices and herbs, add depth.
To get it right, start by roasting your ingredients. This brings out their sweetness and depth. Adjust the heat by adding more peppers. Finally, add lime juice to balance the acidity.
Roasting Techniques for Enhanced Flavor
Roasting enhances your salsa’s flavor. It caramelizes sugars, adding depth and richness. This method is hard to beat.
To roast, place ingredients on a baking sheet and roast until charred and tender. Roast tomatoes and onions for red salsa, or tomatillos and jalapeños for green. Blend with aromatics and spices for a flavorful salsa.
By following these tips, you’ll make a homemade salsa perfect for Chilaquiles. Whether you like red or green, balance flavors and adjust heat to your taste.
Tip #6: Perfect the Layering and Soaking Technique
To make your chilaquiles better, focus on layering and soaking. These steps are key for the right texture and taste. Layering means arranging tortilla chips to soak up just the right salsa amount. Soaking ensures flavors spread evenly without making chips soggy.
Finding the Ideal Tortilla-to-Sauce Ratio
Getting the tortilla and sauce mix just right is an art. Too little sauce, and it’s dry. Too much, and it’s soggy. The ideal tortilla-to-sauce ratio means chips are coated but still crisp. This balance makes each bite tasty and satisfying.
Timing Your Sauce Application for Perfect Texture
When you add sauce is crucial. Too soon, and chips get soggy. Too late, and flavors are weak. Timing your sauce application right lets chips soak up flavors without losing crunch. It’s about finding the perfect mix of flavor and texture.
The “Quick Dip” vs. “Full Soak” Methods
There are two ways to soak tortillas: “quick dip” and “full soak.” The “quick dip” method briefly dips chips in salsa, keeping them crunchy. The “full soak” method soaks chips longer, making them softer and more flavorful. Your choice depends on whether you like chips crunchy or soft.
Mastering layering and soaking makes your chilaquiles delicious and true to their roots. Whether you like them crunchy or soft, knowing these techniques will take your chilaquiles to the next level.
Tip #7: Elevate Your Chilaquiles with Protein and Toppings
To make your chilaquiles even better, add the right protein and toppings. This boosts the flavor and adds texture and nutrition.
Traditional Protein Options That Complement Chilaquiles
Mexican cuisine has many proteins that go great with chilaquiles. Shredded chicken, carnitas (slow-cooked pork), and scrambled eggs are favorites. They match the salsa and tortillas’ flavors and make the meal more filling.
For a true Mexican taste, try carne al pastor or chorizo. These meats are spicy and flavorful, making the dish even more special.
Fresh Toppings That Add Texture and Flavor
Choosing the right toppings is key for chilaquiles. Diced onions, chopped cilantro, and sliced radishes bring a nice crunch. A bit of sour cream or queso fresco can also enhance the taste and texture.
For creaminess, add avocado slices or a fried egg. These toppings balance the salsa’s acidity, creating a perfect flavor mix.
Plant-Based Alternatives for Vegetarian Chilaquiles
Vegetarians have many options for chilaquiles. Roasted vegetables like bell peppers and zucchini add flavor and texture. Grilled portobello mushrooms or tofu marinated in Mexican spices are also great choices.
| Protein Option | Description | Flavor Profile |
|---|---|---|
| Shredded Chicken | Slow-cooked chicken shredded and seasoned with spices. | Mild, slightly spicy |
| Carnitas | Slow-cooked pork that’s tender and juicy. | Rich, savory |
| Scrambled Eggs | Eggs scrambled with onions, chilies, and spices. | Fluffy, slightly spicy |
| Carne Al Pastor | Marinated pork cooked on a vertical spit. | Spicy, smoky |
| Chorizo | Spicy Mexican sausage. | Spicy, meaty |
Tip #8: Serve Your Chilaquiles with Perfect Accompaniments
Adding the right sides to your chilaquiles can make your meal even better. Whether it’s a casual brunch or a big gathering, it’s all about finding the right balance. You want to enhance the flavors of your dish.
Side Dishes That Balance the Meal
For a complete meal, choose sides that bring freshness, texture, and variety. Here are some great options:
- Refried beans or black beans for added protein and fiber
- Grilled or sautéed vegetables like bell peppers, onions, or zucchini
- Mexican street corn or grilled corn on the cob
- A simple green salad with a light vinaigrette
These sides not only match the flavors of chilaquiles but also make your meal look great. They add to the beauty of your brunch at Roscoe’s.
| Side Dish | Description | Complementary Value |
|---|---|---|
| Refried Beans | Cooked pinto beans with onion and garlic | Adds protein and fiber |
| Grilled Vegetables | Seasonal vegetables grilled to perfection | Provides a crunchy texture and freshness |
| Mexican Street Corn | Grilled corn with mayonnaise, cotija cheese, and chili powder | Adds a sweet and tangy flavor |
Beverage Pairings from Coffee to Cocktails
Choosing the right drink can take your chilaquiles to the next level. Whether you like coffee, a refreshing drink, or a cocktail, here are some good choices:
- Coffee: A traditional Mexican coffee or a café de olla pairs nicely with the rich flavors of chilaquiles.
- Fresh Juices: Orange juice or a fresh fruit juice adds a refreshing contrast.
- Margaritas: A classic cocktail that complements the bold flavors of chilaquiles.
- Mexican Beer: A crisp, cold beer can cut through the richness of the dish.
For a special occasion, try a signature cocktail. A Mimosa or a Bloody Maria can add elegance to your Mexican feast.
Tip #9: Prep Ahead and Store Components Properly
To enjoy your chilaquiles more, prep ahead and store right. This saves time and keeps your dish fresh and tasty.
Make-Ahead Strategies for Quick Assembly
Prep parts early to make chilaquiles assembly easy. Make salsa, chop toppings, and fry tortillas before. Here’s what you can prep early:
- Make salsa up to 3 days before and keep it cold.
- Chop onions, cilantro, and cheese, and keep them in sealed containers.
- Fry tortillas and keep them in a sealed container to stay crispy.
Storage Solutions for Leftover Components
Storing leftovers right is key to keeping them good. Here are some tips:
| Component | Storage Method | Storage Duration |
|---|---|---|
| Fried Tortillas | Airtight container at room temperature | Up to 24 hours |
| Salsa | Refrigerate in an airtight container | Up to 3 days |
| Chopped Toppings | Refrigerate in an airtight container | Up to 2 days |
Reviving Crispy Tortillas After Storage
If tortillas get soft after storage, bake them at 350°F (175°C) for a few minutes. This will make them crispy again.
Conclusion: Bringing Roscoe’s Chilaquiles Magic to Your Kitchen
We’ve shown you how to make Roscoe’s Chilaquiles, a key part of Mexican brunch. With these 10 tips, you can make the best Chilaquiles at home. Roscoe’s Chilaquiles is not just food; it’s a mix of crunch, flavor, and freshness.
Try this recipe and share your dish with friends and the todorecipes community. Feel free to add your own twist to Roscoe’s Chilaquiles. It’s perfect for those who love Mexican food or want to try something new.
Learning to make Chilaquiles is more than cooking a meal. It’s about bringing people together. So, start cooking and let’s keep talking about this amazing Mexican brunch dish.